How I Built Pink Walls: A Guide to My Bear Blog Setup
Hey there! If you're curious about how I set up my blog on Bear Blog, styled it, and added all the visuals, here's a little walkthrough!
Bear Blog is minimalist, no-fuss, and super lightweight, which is exactly what I was looking for. I've tried a few other platforms, but this one won me over with its simple interface, while still offering a decent level of customization.
Disclaimer: I used paid features to get the flexibility and design I wanted for my blog. While I chose to use these paid options, Bear Blog is still super affordable, and the free version offers plenty of great features!
I didn't want overly complicated, readymade templates but still wanted the flexibility to design my blog in a straightforward way. I used to love Readymag, and I even tried embedding a blog for more versatility, but it ended up being too complex, too many designs, animations, and the tricky issue of fitting text into all of that.
As I searched through platforms like Wix, Notion, WordPress, and Blogger, I came across Bear Blog. I won’t lie, I was a little skeptical at first. It’s simple, but I was worried about the limited customization options since everything seemed so basic. But after doing some research, I discovered that with a bit of coding, I could make everything look just how I wanted it. Bear with me! I know coding can be intimidating at first, and yes, I did break a few things while modifying my site, but that’s exactly why I created this guide!
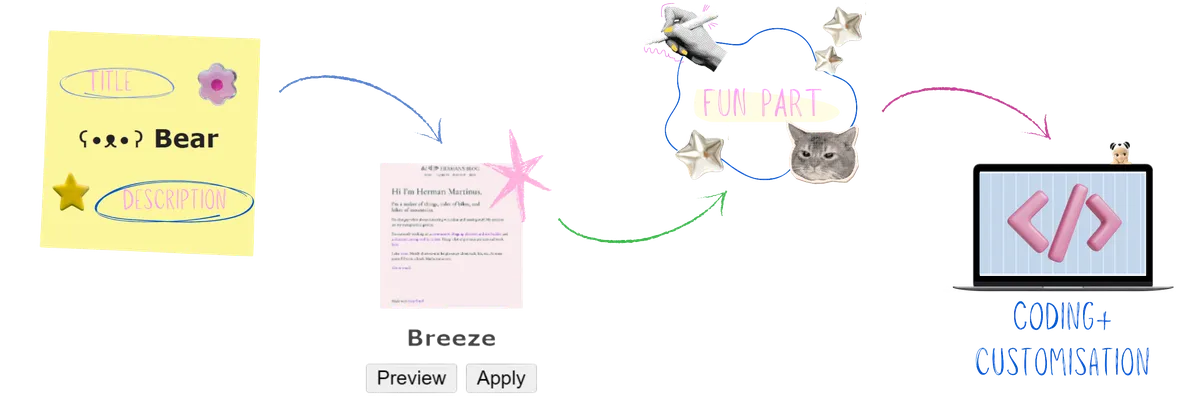
Step 1: Setting up Bear Blog
This step is super simple. I started by creating a free account at https://bearblog.dev/, then gave my blog a title ("Pink Walls") and a cute description (which I later tweaked). To get the look I wanted, I opted for the monthly paid subscription, which has been totally worth it for me. The creator uses the funds to maintain the website and host media, and there's also a lifetime payment option available.
Step 2: Choose a Template
This step is optional, but I found it helpful to start with a basic template to give me a general idea of the look. It made it easier to tweak the CSS later. I chose the "Breeze" theme because it felt more in line with what I envisioned, though I also liked "Typewriter" and "Thoughts." Once you have your skeleton template, you can start making adjustments as needed.
Step 3: The Fun Part!
This is the stage where the real fun begins; designing your blog, creating the look, and curating the aesthetic! Naturally, I turned to my go-to inspiration source: Pinterest. Since I had experience making portfolios, I already had a pretty clear idea of what I wanted. My vision was to create a vibe that felt like a collage, mood board, diary, and sticker fun all in one. I wanted the design to be personal and reflective of me, with little "easter eggs" and meaningful touches sprinkled throughout.
If you're anything like me and love curating Pinterest boards and making mood boards, this part is definitely for you! Once I had a solid idea of the layout, I started gathering graphics and elements. For that, I turned to Canva! While I also love Procreate, I knew it would take more time to implement, so I stuck with Canva for now.
A little hack I use: I search for graphics that inspire me and, to achieve that "Readymag"-style versatility, I opt for transparent backgrounds. This lets my graphics blend seamlessly. I have Canva Pro, but if you don't, my favorite free website to remove backgrounds is Lunapic, which gives you a similar result.
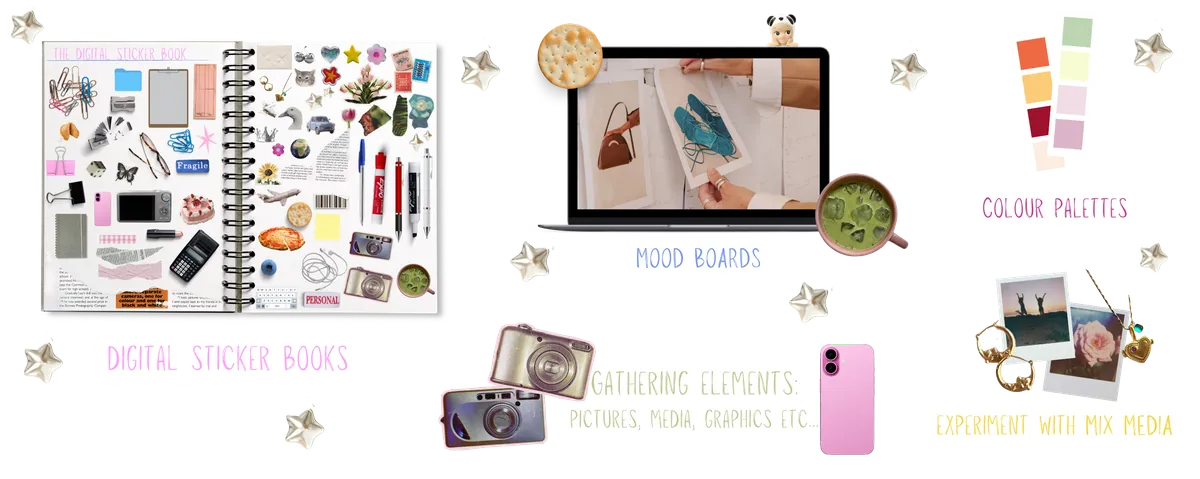
Canva Tips: I prefer using the "Facebook Post" option to maintain consistent size across my graphics. I keep everything for my blog there; the collages, graphics, fonts, and anything that inspires me. It’s like a mini mood board, but it also serves as a space where I can organize everything I want to create. Another thing I love is having a "digital sticker book" where I keep all the graphics I love and sort them by color, aesthetic, and vibe. It helps me stay organized and gives me a clearer vision of what I want.
For the colors, I searched for "color combinations" on Pinterest and chose a few color codes I liked. I was drawn to soft pinks, matcha greens, and lavenders, aiming for a calming yet vibrant palette.
Step 4: What are HTML and CSS?
If you already know a bit of coding, you can skip to the next part.
I recently started learning HTML and CSS myself, so I don’t have tons of experience yet, but it’s not hard to get the hang of once you dive in!
If you're new to web design, you might have heard of HTML and CSS. They're the core building blocks of any webpage. Let’s break them down in the simplest way possible:
HTML (HyperText Markup Language): HTML is the structure of a website. It’s like the skeleton or framework that holds everything together. When you visit a webpage, HTML tells the browser what content to display: text, images, links, buttons, and more.
Example of HTML:
<h1>Welcome to My Blog</h1>
<p>This is a simple introduction.</p>
<img src="image.jpg" alt="A cute cat">
CSS (Cascading Style Sheets): CSS is used to style and beautify the HTML content. While HTML gives the structure, CSS gives it a design; like changing the colors, fonts, and layout.
Example of CSS:
h1 {
font-size: 2rem;
color: #E0E1F6;
text-align: center;
}
p {
font-size: 1rem;
line-height: 1.5;
}
How They Work Together: HTML provides the content and structure, and CSS makes it pretty and gives it life.
Step 5: CSS Customization
Bear Blog lets you add custom CSS in the settings, and that’s where the fun began. Some snippets I used:
body {
font-size: 1.1rem;
font-family: 'Georgia', serif;
background-color: #fff;
color: #2C2C2C;
line-height: 1.6;
}
section {
background-color: #E0E1F6;
padding: 2rem;
margin-top: 2rem;
border-radius: 1rem;
}
This helped me maintain consistent font size and styling across all my pages!
Step 6: Page Sections
Instead of just writing one long scroll of text, I broke my content into cute sections using HTML in my posts. Here’s a base layout I use a lot:
<section style="background-color: #E0E1F6;
<h2>Title</h2>
<img src="..." alt="Image">
<p>Content</p>
</div>
</section>
Step 7: Final Touches
I made sure each page followed a consistent layout: same font size, same rounded corners, same spacing.
You can name your categories(pages) fun names like Tea Time, Bits & Bobs, and Sketchbook etc...
Bear Blog made it super easy for me to focus on writing and design. And if you’re into aesthetic pages and personal storytelling, I 100% recommend giving it a go. I’m planning to create a more in-depth explanation of the coding behind my blog in a future post, so stay tuned if you're interested in knowing more!
If you'd like me to share my full CSS or HTML templates, just message me!
- Carina